Bristol Beaufort
| Type 152 Beaufort | |
|---|---|
 Colour photo of two Beaufort Mk.Is of 217 Squadron | |
| General information | |
| Type | Torpedo bomber |
| National origin | United Kingdom |
| Manufacturer | Bristol Aeroplane Company |
| Primary users | Royal Australian Air Force |
| Number built | 1,121 (+700 in Australia)[1] |
| History | |
| Introduction date | 1939 |
| First flight | 15 October 1938 |
| Retired | 1944 |
| Developed from | Bristol Blenheim |
| Variants | Bristol Beaufighter |
The Bristol Beaufort (manufacturer designation Type 152) is a British twin-engined torpedo bomber designed by the Bristol Aeroplane Company, and developed from experience gained designing and building the earlier Blenheim light bomber.[2] At least 1,180 Beauforts were built by Bristol and other British manufacturers.
Beauforts first saw service with Royal Air Force Coastal Command and then the Royal Navy Fleet Air Arm from 1940. They were used as torpedo bombers, conventional bombers and mine-layers until 1942,[3] when they were removed from active service and were then used as trainer aircraft until being declared obsolete in 1945.[4] Beauforts also saw considerable action in the Mediterranean; Beaufort squadrons based in Egypt and on Malta helped interdict Axis shipping supplying Rommel's Deutsches Afrikakorps in North Africa.
Although it was designed as a torpedo-bomber, the Beaufort was more often used as a medium day bomber. The Beaufort also flew more hours in training than on operational missions and more were lost through accidents and mechanical failures than were lost to enemy fire.[5] The Beaufort was adapted as a long-range heavy fighter variant called the Beaufighter, which proved to be very successful and many Beaufort units eventually converted to the Beaufighter.[6]
The Australian government's Department of Aircraft Production (DAP) also manufactured variants of the Beaufort. These are often known collectively as the DAP Beaufort.[7] More than 700 Australian-built Beauforts saw service with the Royal Australian Air Force in the South West Pacific theatre, where they were used until the end of the war.
Design and development
[edit]Origins
[edit]The Beaufort came from Bristol's submission to meet Air Ministry Specifications M.I5/35 and G.24/35 for a land-based, twin-engined torpedo-bomber and a general reconnaissance aircraft. With a production order following under Specification 10/36, the Bristol Type 152 was given the name Beaufort after the Duke of Beaufort, whose ancestral home was nearby in Gloucestershire.[8][9][10] The competing torpedo bomber entry from Blackburn was also ordered as the Blackburn Botha; in an unprecedented step, both designs were ordered straight off the drawing board, an indication of how urgently the RAF needed a new torpedo bomber.[8][N 1] 320 Beauforts were ordered. Initially, because of their commitment to the Blenheim, Bristol were to build 78 at their Filton factory, with the other 242 being built by Blackburn. These allocations would be changed later.[8]
Although the design looked similar to the Blenheim, it was somewhat larger, with an 18 in (46 cm) increase in wingspan. The fuselage was longer in the nose and taller to accommodate a fourth crew member and the aircraft was considerably heavier. The larger bomb-bay was designed to house a semi-recessed torpedo or an increased bomb load. Due to the increased weight the Bristol Mercury engines on the Blenheim were to be replaced by more powerful, sleeve valve, Bristol Perseus motors. It was soon determined that even with the Perseus, the Beaufort would be slower than the Blenheim and so a switch was made to the larger Bristol Taurus engine, another sleeve valve design.[8] For these engines, chief designer Roy Fedden developed special low-drag NACA cowlings, which exhausted air through vertical slots flanking the nacelles under the wings. Air flow was controlled by adjustable flaps.[8]
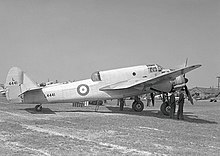
The basic structure, although similar to the Blenheim, introduced refinements such as the use of high-strength light alloy forgings and extrusions in place of high-tensile steel plates and angles; as a result the structure was lighter than that of the Blenheim.[11][N 3] The wing centre section was inserted into the centre fuselage and the nacelle structure was an integral part of the ribs, to which the main undercarriage was attached. Transport joints were used on the fuselage and wings: this allowed sub-contractors to manufacture the Beaufort in easily transportable sections and was to be important when Australian production got under way.[11] The Vickers main undercarriage units were similar to but larger than those of the Blenheim and used hydraulic retraction, with a cartridge operated emergency lowering system.[N 4]
The first prototype rolled out of Filton in mid-1938. Problems immediately arose with the Taurus engines continually overheating during ground testing. New, more conventional engine cowlings, with circumferential cooling gills, had to be designed and installed, delaying the first flight, which took place on 15 October 1938. As flight testing progressed, it was found that the large apron-type undercarriage doors, similar to those on the Blenheim, were causing the aircraft to yaw on landing. These doors were taken off for subsequent flights. On the second prototype and all production aircraft, more conventional split doors, which left a small part of the tyres exposed when retracted, were used.[12]
The results of high level bombing tests carried out at Boscombe Down at an altitude of 10,000 ft (3,000 m) and an airspeed of 238 mph (383 km/h) showed that the Beaufort was, in the words of the test pilot, "an exceptionally poor bombing platform, being subject to an excessive and continuous roll, which made determination of drift particularly difficult".[13] After 1941, British Beauforts were fitted with semi-circular plates on the trailing edges of the upper wing behind the engine nacelles to smooth airflow and improve directional stability.[14]
As Blenheim production took priority and engine overheating problems continued, production was delayed; the bomber was first flown in October 1938 and should have been available almost immediately, it was not until November 1939 that production started in earnest. Several of the first production Beauforts were engaged in working-up trials and final service entry began in January 1940 with 22 Squadron of RAF Coastal Command.[15]
British Beauforts
[edit]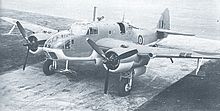
A total of 1,013 Taurus powered Mark Is were produced and a number of changes were introduced into the line. The original curved perspex bomb aimers' nose panels were replaced by flat, non-distorting panels from the 10th production aircraft. Successive Marks of the Bristol Taurus engine were installed: starting with the Taurus III, the more reliable Taurus IIs were used whenever possible. Initially Beauforts with the Taurus II engines were designated Beaufort Mk.II, while those with other Taurus Marks continued to be Beaufort Mk.Is. Finally all Taurus-engined Beauforts became Mk.Is with the introduction of the Pratt & Whitney Twin-Wasp-powered Beaufort Mk.II. The Taurus Mk.IIs were modified to Mk.IIa, which later became the Taurus Mk.VI. All of these versions produced 860–900 hp (640–670 kW). The final marks of Taurus engines used were the more powerful 1,130 hp (840 kW) XII and XVIs. The Taurus engines drove de Havilland Type DH5/19 constant speed propellers.[16]
As Beaufort units entered service, it was found that the defensive armament was inadequate and extra .303 in (7.7 mm) Vickers GO machine guns were fitted; two on a gimbal mounting in the forward nose and single guns on pivots on either beam. A remotely controlled .303 in (7.7 mm) Browning machine gun was fitted, firing to the rear under the nose. Housed in a clear blown transparency, it was found to be of little use and most operational units soon discarded them.[17]
Fairey-Youngman pneumatic dive brakes were fitted to the wing trailing edges of several Beaufort IIs. After adverse reports from pilots these were locked shut. It was found that the curved alloy extensions on the trailing edges improved the flight characteristics and similar panels were fitted on all later production Beauforts.[18]
When it became apparent that the Taurus engines had problems, planning commenced to re-engine the aircraft with 1,200 hp (890 kW) Pratt & Whitney R-1830 Twin-Wasp radials, which were of similar diameter and slightly lighter, driving Hamilton Standard bracket-type variable-pitch propellers. There was no guaranteed supply of the Twin Wasp and production reverted to the Taurus-engined Mark Is after 165 Beaufort Mark IIs had been built, starting with AW244, which first flew in September 1941. Performance with the Twin-Wasps was marginally improved: maximum speed went up from 271 to 277 mph (436 to 446 km/h) and the service ceiling increased from 16,500 to 18,000 ft (5,000 to 5,500 m). Normal range was reduced from 1,600 to 1,450 mi (2,570 to 2,330 km).[19][N 5]
Other modifications introduced on the Mk II used on late Mk Is included replacing the elongated direction finding antenna with a loop aerial enclosed in a clear, tear-drop fairing on the top of the cabin. ASV Mk III was added with yagi antennae under the nose and wings and a Bristol B1.Mk.V turret with two .303 in (7.7 mm) Browning machine guns was fitted.[20] The final British-built version of the Beaufort was the Pratt & Whitney-powered T.Mk.II, with 250 produced from August 1943. In this version, the turret was removed and faired over. The last ever Beaufort was a T.Mk.II, which left the Bristol Banwell factory on 25 November 1944.[7]
Australian-built Beauforts
[edit]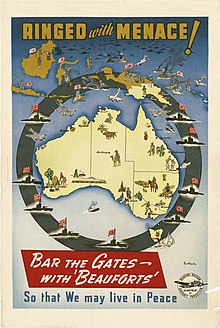
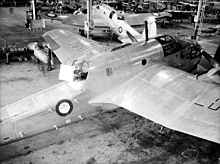
As the design for the Beaufort began to mature, the Australian Government invited a British Air Mission to discuss the defence needs of Australia and Singapore. It was also a step towards expanding the Australian aircraft industry. The Beaufort was chosen as the best General Reconnaissance (G.R.) aircraft available and on 1 July 1939, orders were placed for 180 airframes and spares, with the specially formed Beaufort Division of the Commonwealth Department of Aircraft Production (DAP).[7]
The Australian Beauforts were to be built at the established DAP plant in Fishermans Bend, Melbourne and a new factory at Mascot, New South Wales; to speed up the process drawings, jigs and tools and complete parts for six airframes were supplied by Bristol. The bulk of Australian-built Beauforts used locally available materials.[7]
One of the decisive factors in choosing the Beaufort was the ability to produce it in sections. Because of this, railway workshops were key subcontractors:
- Chullora Railway Workshops NSW: Front fuselage, undercarriage, stern frames, nacelles.
- Newport Workshops Victoria: Rear fuselage, empennage.
- Islington Railway Workshops, South Australia: Mainplanes, centre-section.[21]
Taurus engines, aircraft components and the associated equipment were shipped out to be joined in October 1939, by the eighth production Beaufort L4448. With the outbreak of war, the possibility that supplies of the Taurus engines could be disrupted or halted was considered, even before the British government placed an embargo on exporting war materials with the Blitzkrieg on France, the Netherlands and Belgium in May 1940. It was proposed that a change of powerplant could be made to the Pratt & Whitney Twin Wasp, which was already in use on Royal Australian Air Force Lockheed Hudsons.[7] Orders for the engine were placed and a factory was set up at Lidcombe and run by General Motors Holden. The locally built engines were coded S3C4-G, while those imported from America were coded S1C3-4.[22] Three-bladed Curtiss-Electric propellers were fitted to Beaufort Mks V, VI, VIII and IX while Beaufort Mks VA and VIII used Hamilton Standard propellers.[22] In early 1941, L4448 was converted as a trials aircraft and the combination was considered a success.[23][N 6] The first Australian-assembled Beaufort A9-1 flew on 5 May 1941 with the first Australian-built aircraft A9-7 coming off the production line in August.[24] In total 700 Australian Beauforts were manufactured in six series (see variants).[25]
A distinguishing feature of Australian Beauforts was a larger fin, which was used from the Mk VI on. Armament varied from British aircraft: British or American torpedoes were able to be carried and the final 140 Mk VIII were fitted with a locally manufactured Mk VE turret with .50 cal machine guns. A distinctive diamond-shaped DF aerial was fitted on the cabin roof, replacing the loop antenna.[26] Other Australian improvements included fully enclosed landing gear and Browning M2 .5 in (13 mm) machine guns in the wings. Some were also fitted with ASV radar aerial arrays on either side of the rear fuselage.[27]
The Mk.XI was a transport conversion, stripped of armament, operational equipment and armour and rebuilt with a redesigned centre fuselage. Maximum speed was 300 mph (480 km/h) and a payload of 4,600 lb (2,100 kg) could be carried. Production of the Australian Beaufort ended in August 1944 when production switched to the Beaufighter.[28]
Operational history
[edit]Europe
[edit]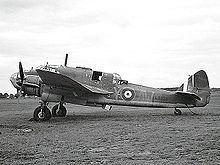

Although it did see some use as a torpedo bomber, including attacks on the battleships Scharnhorst and Gneisenau while in port in Brest, the Beaufort more often used bombs in European service.[13]
In early 1940, 22 Squadron equipped with Vildebeests, began to receive Beauforts. The Beaufort was a much faster, heavier aircraft than the biplane and the crews needed a great deal of training in torpedo-dropping, using new techniques required by the Beaufort.[29] The lighter, slower Vildebeest was able to dive then flatten out before launching the torpedo; Beauforts carried too much speed after diving so it needed a longer, level approach to the torpedo drop.[29] Because of this, and because of a shortage of torpedoes, the squadron's first operations consisted of laying magnetic mines ("Gardening" in RAF parlance) and dropping conventional bombs. As an alternative to the torpedo, the Beaufort could carry a 2,000 lb (910 kg) bomb using a purpose built carrier. On one of its first bombing sorties, on 7 May 1940, a Beaufort dropped the first British 2,000 lb (910 kg) bomb, at a German cruiser anchored off Norderney.[13]
The first Beaufort operation took place on the night of 15/16 April, when nine Beauforts laid mines in the Schillig Roads (north of Wilhelmshaven). One Beaufort failed to return.[13] A second unit, 42 Squadron began to re-equip with Beauforts, starting in April. The Beaufort still had teething problems and after some Beauforts were lost in mysterious circumstances, a Court of Enquiry in June 1940 concluded that the Taurus engines were still unreliable and both operational squadrons were grounded until the engines could be modified.[30]
The first RAF torpedo attack of the war came on 11 September 1940, when five aircraft of 22 Squadron attacked a convoy of three merchant ships off Ostend (Oostende in Belgium). One torpedo hit a 6,000 long tons (6,100 t) ship. Four days later, the first "Rover" was mounted; a Rover was an armed reconnaissance mission carried out against enemy shipping by a small number of aircraft operating independently. "Rovers" became a major part of Beaufort operations over the next 18 months.[N 7] Other more hazardous operations were to follow, with one Beaufort pilot being awarded a posthumous VC.
The only other UK based units to be equipped and fly operationally with the Beaufort, 86 Squadron and 217 Squadron, were operational by the middle of 1941.[32] Beauforts also equipped some Commonwealth Article XV squadrons serving within the RAF but because of supply shortages, were replaced by other aircraft types before the units flew operationally.[33]
Torpedo dropping
[edit]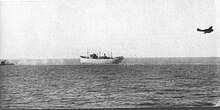
A successful torpedo drop required that the approach run to the target needed to be straight and at a speed and height where the torpedo would enter the water smoothly: too high or too low and the torpedo could "porpoise" (skip through the water), dive or even break up. Height over the water had to be judged without the benefit of a radio altimeter and misjudgement was easy, especially in calm conditions.[34] For the Beauforts using the 18-inch (450-mm) Mk XII aerial torpedo, the average drop-height was 68 ft (21 m) and the average range of release was 670 yd (610 m).[35] During the run-in, the aircraft was vulnerable to defensive anti-aircraft fire and it took courage to fly through it with no chance of evasive manoeuvres. The Beaufort's optimum torpedo dropping speed was a great deal higher than that of the Vildebeests it replaced, and it took practice to judge the range and speed of the target ship. A ship the size and speed of Scharnhorst would look huge, filling the windscreen at well over 1 mi (1.6 km) and it was easy to underestimate the range.[36] In action, torpedoes were often released too far away from the target, although there was one recorded instance of a torpedo being released too close.[37] For safety reasons, torpedo warheads had a set distance (usually about 300 yd (270 m) from the release point before they were armed. It also took some distance for the torpedo to settle to its running depth.[34] Once the torpedo had been dropped, if there was room, a sharp turn away from the enemy was possible: more often than not the aircraft had to fly around or over the ship, usually at full-throttle and below mast height. A sharp pull-up could be fatal as it exposed a large area of the aircraft to anti-aircraft guns.[38]
Attacks on capital ships
[edit]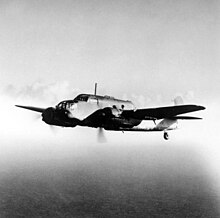
Some of the Beaufort's actions were attacks on warships of the German Kriegsmarine. The first attack was on 21 June 1940, when nine Beauforts of 42 Squadron attacked the Scharnhorst off the Norwegian coast. No torpedoes were available at RAF Wick and a dive bombing attack was carried out using two 500 lb (230 kg) bombs. The Beauforts encountered Messerschmitt Bf 109s protecting the battleship and only four returned; shortly after, Beauforts were grounded for modifications to their Taurus engines.[39]
In early April 1941, after an air raid on Brest by Bomber Command, the Gneisenau had to move out of dry-dock because of an un-exploded bomb. Photo reconnaissance revealed that the ship was in the inner harbour. An estimated 1,000 flak guns of all calibres protected the base and adding complication to the danger was the realisation that Gneisenau was only about 500 yd (460 m) from a harbour mole, requiring extremely accurate torpedo drops.[40] The aircraft would be forced into a steep banking turn during the escape to avoid rising ground surrounding the harbour.[41] In spite of these dangers 22 Squadron, based at RAF St Eval, was ordered to make a torpedo attack, timed to take place just after dawn on 6 April 1941. It was planned to attack the torpedo nets thought to be protecting the ship, using three Beauforts armed with bombs; another three Beauforts would then attack the ship with torpedoes. Following heavy rain that had drenched the airfield, the bomb-carrying aircraft became bogged down. Because of a sea mist, the other three Beauforts arrived at Brest independently; one, flown by F/O Kenneth Campbell, managed to penetrate the harbour and torpedo Gneisenau but was shot down immediately afterwards. Campbell was awarded the VC and his Observer, Sergeant J. P. Scott of Canada, the Distinguished Flying Medal. The other two crew members were Sgts R. W. Hillman and W. Mallis; all were lost.[42]
On the night of 12/13 June 1941, 13 Beauforts of 42 Squadron, based at RAF Leuchars and a detachment of five Beauforts of 22 Squadron from Wick, were sent out to find the heavy cruiser Lützow and an escort of four destroyers, which had been sighted near Norway. At midnight, a signal from a Blenheim of 114 Squadron confirmed the position of the ships but most of the Beauforts failed to find them.[43] One 42 Squadron aircraft piloted by Flight Sergeant Ray Loveitt (who had become separated from the main force) took Lützow by surprise. Loveitt did not attack at once but remained in the vicinity, simulating a German escort plane. Copying the recognition signals that other Junkers Ju 88 and Messerschmitt Bf 110 exchanged with the German ships, Loveitt was able to attack without a defensive shot being fired, Loviett's torpedo hit her on the port side. The ship took on a heavy list and lost all speed. The hit also activated her smokescreen generator and one other Beaufort attacking Lūtzow missed because of the smokescreen. The plane was then shot down by a Messerschmitt Bf 109; Lützow was under repair for six months.[44][45]
During the famous Operation Cerberus, the "Channel Dash" by Scharnhorst and Gneisenau and the heavy cruiser Prinz Eugen, which took place from 12 February 1942, three Beaufort units, with 33 serviceable aircraft were available: 22 Squadron was under orders to move to Singapore. 42 Squadron, based at Leuchars in Scotland, was supposed to move to Manston but had been delayed by snow. Only 86 and 217 squadrons were in position to attack the German ships. Of the 33 Beauforts, 28 eventually set out to attack the German ships: 13 failed to find them, three were shot down and on one the torpedo failed to release. Only 11 Beauforts sighted the battleships and launched torpedoes, none of which struck a target.[46] One of the conclusions reached by a later Court of Inquiry was that a faster, longer-ranged torpedo bomber than the Beaufort was needed.[47] Bristol was already working on a torpedo-carrying conversion of the Beaufighter (a development of the Beaufort airframe) and were later to develop the Brigand.[48][49]
The final major operation to feature Beauforts before they were moved to other theatres was an attack on the heavy cruiser Prinz Eugen. A report reached Coastal Command on 16 May 1942 that this ship, escorted by two destroyers, was off Trondheim steaming south-west at high speed.[N 8] A strike force was formed with 12 Beauforts of 42 Squadron, six Blenheims of 404 (RCAF) Squadron and four flak-suppression Beaufighters, two each from 235 Squadron and 248 Squadron. Prinz Eugen was sighted with four destroyers. The Beaufighters went first, raking the ships with cannon fire as the Blenheims made dummy torpedo runs. Some Bf 109s (more than likely from I./JG 5) appeared and the Blenheims attempted to fend them off as the Beauforts started their attack. Three Beauforts were shot down by defensive fire from the ships before they could launch their torpedoes and the nine torpedoes that were launched failed to hit the target. One Beaufort, already damaged by anti-aircraft fire, was then attacked by three Bf 109s: in spite of further heavy damage, the pilot made a successful crash-landing back at base. In the meantime, another strike force of 15 Beauforts from 86 Squadron was sent too far north by a reporting error. They too were attacked by Bf 109s: four Beauforts were shot down (in return the crews claimed to have shot down five fighters) and of the 11 Beauforts remaining, seven were forced to jettison their torpedoes.[51]
In spite of its failure, this operation set the pattern for Coastal Command operations: Beaufighters were used for the first time for flak-suppression and escort and there had been diversionary tactics used to try to reduce attention on the attacking torpedo aircraft. It also marked the end of Beaufort operations from Britain.[52]
The remaining Beaufort squadrons now started moving east:
- 42 Squadron left Scotland in June 1942 bound for Ceylon but operated in North Africa until December.
- 86 Squadron moved to the Mediterranean in July and the unit was reduced to cadre: In October it was re-equipped with Consolidated Liberator Mk.IIIs. One ex-86 Squadron Beaufort flight, along with one from 217 Squadron, joined up with a flight from 39 Squadron on Malta, later becoming a part of a reconstituted 39 Squadron.
- The 217 Squadron ground echelon left for Ceylon in May 1942, while the Beauforts flew out via Malta. In August, 217 Squadron, minus a Beaufort flight, moved on to Ceylon to be re-equipped with Hudsons. 22 Squadron at various times operated Beauforts out of Vavuniya and Ratmalana, Ceylon.[53]
Mediterranean and Malta
[edit]The first Beaufort unit in the Mediterranean was 39 Squadron, which reformed in Egypt in January 1941. Initially equipped with Bristol Blenheims and Martin Marylands, the unit started re-equipping with Beaufort Mk.Is the following August.[54] The first operation in which Beauforts took part was an attack on the Italian T18 on 28 January 1942. The three Beauforts of 39 Squadron included in a large strike force succeeded in crippling the 13,098 GRT transport Victoria, which was carrying 1,400 troops. The ship was then sunk by four Albacores of 820 Naval Air Squadron. Escort ships rescued 1,046 troops.[55][56]
In another operation, during the early hours of 15 June 1942, nine Beauforts of 217 Squadron, which had just flown in from England, took off from RAF Luqa, Malta to intercept ships of the Regia Marina, which had sailed from Taranto. Few of the Beaufort crews had experience in night-flying: four aircraft failed to find the rendezvous and set out independently. One, flown by Flying Officer Arthur Aldridge discovered the Italian Fleet some 200 mi (320 km) to the east of Malta. Like Loviett's attack on Lūtzow, his Beaufort was mistaken for a friendly aircraft by Italian lookouts. Aldridge torpedoed and crippled the heavy cruiser Trento, whose anti-aircraft fire started only after the Beaufort had escaped.[57] The main formation of Beauforts then came in to attack, having been guided in by the gunfire. In the confusion and the smokescreen that had been laid by the Italian warships, 217 Squadron claimed several torpedo hits for the loss of one Beaufort, which belly-landed at Luqa. In spite of the claims, none of the other ships had been hit. Trento was sunk later by two torpedoes fired by the submarine HMS Umbra, which had witnessed the aerial attack.[58]
By July 1942, 86 Squadron Beauforts and crews had arrived on Malta and were soon absorbed into a reconstituted 39 Squadron, which came under the command of the inspirational Squadron Leader Patrick Gibbs, who was soon promoted to Wing Commander; 217 squadron moved on to Ceylon.[59][60][N 9]
Over the next 11 months, the Beaufort force, now usually accompanied by Beaufighters, was instrumental in crippling the convoy supply lines that were vital to Rommel's Afrika Korps. At night, torpedo-carrying Vickers Wellingtons of 38 Squadron[62] also played an important part in attacking convoys. Some important ships destroyed or badly damaged were:
- MV (Motor Vessel) Reichenfels, 7,744 GRT: torpedoed by 217 Sqn Beaufort, 21 June.[63][64]
- MV Rosalino Pilo, 8,326 GRT: torpedoed by two aircraft of 39 Sqn, torpedoed and sunk by submarine HMS United, 17 August.[65][66]
- Tanker Pozarica, 7,800 tons (7,925 tonnes): torpedoed and badly damaged by three aircraft of 39 Sqn, later beached, 21 August.[67][N 10]
- Steam Ship Dielpi, 1,500 tons (1,360 tonnes) : torpedoed and sunk by three aircraft of 217 Sqn, 27 August.[68]
- Tanker San Andrea, 5,077 tons (4,606 tonnes) : torpedoed and sunk by two aircraft of 39 Sqn, 30 August. (Gibbs' last operation.)[69]
- Tanker Proserpina, 4,869 GRT : Destroyed by combined strike of Beauforts of 47 Sqn and Bisleys of 15 SAAF Sqn, 27 October.[70]
- Tanker Thorsheimer, 9,955 tons (9,031 tonnes): Torpedoed by four Beauforts of 39 Sqn, 21 February 1943.[71]
In June 1943, 39 Squadron, the last operational Beaufort unit, converted to Beaufighters.[71]
Pacific
[edit]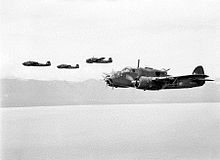
During the first years of World War II, the Australian government found itself unable to procure twin-engine bomber aircraft for home duties in Australia. It was decided that the Australian Department of Aircraft Production (DAP) would build Beauforts under licence, for the Royal Australian Air Force (RAAF).
By late 1941, British authorities had also ordered 180 Australian-built Beauforts for the RAF Far East Command, for use in East Asia. In particular, DAP Beauforts were to replace the extremely outdated (1928) Vickers Vildebeests operated by No. 100 Squadron RAF at Singapore. Q Flight, a detachment from 100 Squadron was based in Australia for operational conversion purposes.
When Japan entered the war and invaded Malaya on 8 December 1941, about 20 DAP Beauforts had been completed and delivered to Q Flight in Australia. Only six Australian-built Beauforts reached Singapore, just after hostilities began. Over Malaya and Singapore, 100 Squadron continued to operate Vildebeests,[72] suffering severe losses. One Beaufort, attached to Air Headquarters, Singapore as a reconnaissance aircraft was attacked, during its first sortie, by Japanese fighters, severely damaged and written-off. The RAF decided that the Beaufort lacked sufficient performance and armament to defend itself against late model fighters, and that 100 Squadron's crews lacked sufficient training and experience on the type. As Japanese forces approached Singapore in early 1942, RAF bases there were abandoned; the remaining Beauforts and 100 Squadron personnel were evacuated to Australia.[24] All Australian-built Beauforts previously scheduled for British squadrons were subsequently delivered to the RAAF.
The first Beaufort unit formed in Australia, on 25 February 1942 was No. 100 Squadron RAAF, so named because it was formed partly from members of its RAF counterpart. In the light of the problems encountered by the first Beauforts based at Singapore, the unit was carefully trained and slowly brought up to operational status. Its first operational sorties were carried out on 25 June when a Japanese ship heading towards Lae, New Guinea was attacked by five Beauforts operating from Port Moresby, which resulted in three Beauforts hitting the ship with bombs, with one Beaufort being damaged by anti-aircraft fire. Out of two Beauforts that carried out a diversionary attack on Lae, one failed to return.[72]
Production at DAP continued to increase, reaching almost one a day in 1943. The Beaufort served with 19 RAAF squadrons and played an important role in the South West Pacific Area, as a maritime patrol/strike aircraft and bomber. Aviation historian William Green has written that the Beaufort's "part in the defeat of the Japanese forces in the South-West Pacific was probably of greater importance than that of any other single aircraft type."[73]
In the Battle of the Bismarck Sea, on 3 March 1943, eight Beauforts from No. 100 Squadron RAAF took off from the Milne Bay to attack the Japanese troop convoy with torpedoes although no hits were scored. Later in the battle, 13 Beaufighters from No. 30 Squadron RAAF approached the convoy at low level to give the impression they were Beauforts making a torpedo attack.[74] The ships turned to face them, the standard procedure to present a smaller target to torpedo bombers, allowing the Beaufighters to maximise the damage they inflicted on the ships' anti-aircraft guns, bridges and crews in strafing runs with their autocannons and machine guns.[75]
This section needs expansion with: content on 1943–44 service and retirement/replacement. You can help by adding to it. (October 2010) |
Replacement
[edit]In March 1942 a Bristol Beaufighter was successfully tested as a torpedo-carrier and from 1943 a number of Middle East-based squadrons replaced the Beaufort with the so-called "torbeau" (Beaufighter TF Mk X). The last RAF aircraft was retired in 1946[76]
Variants
[edit]British
[edit]- Beaufort Mk.I
- 1,013 built. Torpedo bomber, reconnaissance version for the RAF, powered by two Bristol Taurus II, III, VI, XII or XVI sleeve valve radial engines. First British production version.[77]
- Beaufort Mk.II
- 167 built. Torpedo bomber, reconnaissance version for the RAF, powered by two Pratt & Whitney R-1830-S3C4-G Twin Wasp radial engines.[77]
- Beaufort T Mk. II
- 249 conversions from Mk II. Trainer with rear turret position faired over; allocated to Torpedo training units and OTUs.[78]
- Beaufort Mk.III
- Project only. Intended to be powered by two Rolls-Royce Merlin XX inline piston engines.[77]
- Beaufort Mk.IV
- One prototype only; powered by two Bristol Taurus XX radial piston engines.[77]
- Total Production = 1,180
Australian
[edit]- Beaufort Mk.V
- 50 built. First Australian built version, powered by two Pratt & Whitney R-1830-S3C4-G Twin Wasp radial piston engines with Curtiss Electric propellers.[79]
- Beaufort Mk.Va
- 30 built. Pratt & Whitney S3C4-G with Hamilton Standard propellers. Similar to the Beaufort Mk V, but fitted with a larger tail.[79]
- Beaufort Mk.VI
- 40 built. Pratt & Whitney-S1C3 Twin Wasp radial piston engines with Curtiss Electric propellers.[79]
- Beaufort Mk.VII
- 60 built. Pratt & Whitney S1C3-G with Hamilton Standard propellers.[79]
- Beaufort Mk.VIII
- 520 built. Pratt & Whitney S3C4-G with Curtiss Electric propellers. Improved version fitted with an ASV radar, it could carry American or British mines or torpedoes.[79]
- Total Production = 700
- Beaufort Mk.IX, also known as 'Beaufreighters'
- 46 Beauforts of various marks were converted into light transport aircraft for the RAAF and used Pratt & Whitney S3C4-G with Curtiss Electric propellers.[79]
Operators
[edit]Surviving aircraft
[edit]
Museum display
[edit]- Beaufort Mk.VII A9-150 – "cockpit only" displayed at the Australian National Aviation Museum, Moorabbin, Victoria (possibly to be incorporated into rebuild of A9-13) [80] (note: previously incorrectly identified as A9-152)
- Beaufort Mk. VII A9-164 – "cockpit only" under restoration at the Gippsland Armed Forces Museum[81]
- Beaufort Mk.VIII A9-210/QH-D – "cockpit only" displayed at the Australian National Aviation Museum, Moorabbin, Victoria (originally incorporated into rebuild of A9-13)[82]
- Beaufort Mk.VIII A9-501 – "cockpit only" under restoration by The Beaufort Restoration Group, Caboolture, Queensland for return and display at Gove Northern Territory [83]
- Beaufort Mk.VIII A9-557/QH-L – on display at Australian War Memorial, Canberra.[84]
- Beaufort Mk.IX A9-703 – "cockpit only" displayed at the Camden Museum of Aviation
- Beaufort Mk.VIII A9-559 – a composite of several RAAF aircraft, displayed as Mk.IIA DD931/L at the Royal Air Force Museum London[85]
Under restoration/stored
[edit]- Beaufort Mk.V A9-13/T9552 – under restoration to static at the Australian National Aviation Museum, Moorabbin, Victoria[86][87]
- Beaufort Mk.VII A9-141/KT-W – under restoration to airworthy as VH-KTW by The Beaufort Restoration Group, Caboolture, Queensland. Includes rear fuselage of A9-485[88]
- Beaufort Mk.VIII A9-555 – under restoration with The Bristol Heritage Collection, Hessel Field, Clifton, Tennessee; has tail of A9-182[89]
- Remains of four other identified RAAF Beaufort hulks were recovered from Tadji in PNG and were known to be stored with the late David Tallichet at Chino, California for some years.[90] One of these was used to create the RAF's Museum's Beaufort for display. Most of the remaining hulks have been purchased by Australian collectors, to contribute to restorations in Australia.[91]
Specifications (Beaufort I)
[edit]Data from Beaufort Special,[77] Jane's Fighting aircraft of World War II[92]
General characteristics
- Crew: 4
- Length: 44 ft 2 in (13.46 m)
- Wingspan: 57 ft 10 in (17.63 m)
- Height: 14 ft 3 in (4.34 m)
- Wing area: 503 sq ft (46.7 m2)
- Airfoil: root: RAF-28 (18%); tip: RAF-28 (10%)[93]
- Empty weight: 13,107 lb (5,945 kg)
- Gross weight: 21,228 lb (9,629 kg)
- Powerplant: 2 × Bristol Taurus II, Taurus III, Taurus VI, Taurus XII or Taurus XVI 14-cylinder air-cooled sleeve-valve radial piston engine, 1,130 hp (840 kW) each
- Propellers: 3-bladed de Havilland Hydromatic constant-speed propellers
Performance
- Maximum speed: 271.5 mph (436.9 km/h, 235.9 kn) at 6,500 ft (2,000 m)[N 11]
- 225 mph (196 kn; 362 km/h) at sea level
- Cruise speed: 255 mph (410 km/h, 222 kn) at 6,500 ft (2,000 m)[N 12]
- Range: 1,600 mi (2,600 km, 1,400 nmi)
- Service ceiling: 16,500 ft (5,000 m)
- Rate of climb: 1,150 ft/min (5.8 m/s)
- Wing loading: 42.2 lb/sq ft (206 kg/m2)
- Power/mass: 0.106 hp/lb (0.174 kW/kg)
Armament
- Guns: ** 3 .303 in (7.7 mm) Vickers GO machine guns (two in Bristol Mk IV dorsal turret, one in port wing) or;
- 6 .303 in (7.7 mm) Vickers GO machine guns (Two fixed in nose, two in turret, one in port wing and one firing laterally from entry hatch.) Late production.[17]
- 1 .303 in (7.7 mm) Browning machine gun in rear-firing chin blister
- Bombs: ** One 1,605 lb (728 kg) 18 in Mk XII torpedo or.
- 2,000 lb (907 kg) bomb or a torpedo under the fuselage or 1,000 lb (454 kg) bombs in the bomb bay and 500 lb (227 kg) under the wings, or mines.
See also
[edit]Aircraft of comparable role, configuration, and era
Related lists
Notes
[edit]- ^ In the 1930s, the RAF mainly relied on the obsolescent Vickers Vildebeest biplane.[8]
- ^ L4441 was in a natural metal finish and has the production-type engine cowlings and redesigned nacelles without the undercarriage doors used on all later Beauforts.[11]
- ^ The added weight of the Beaufort was due to the additional equipment and crew accommodation, plus the heavier engines.
- ^ Many Beaufort components, including construction techniques and the undercarriage units, were to be used in the later Bristol Beaufighter.[6]
- ^ Mark I performance figure relate to late production versions with the more powerful Taurus Mks. XII/XVI. Those with the earlier versions were slower.[16]
- ^ The decision to install Twin-Wasps in British Beauforts was undertaken almost simultaneously. The trials aircraft was N1110.[3]
- ^ During a Rover on 11 December 1940, a Beaufort flown by Flt. Lt. Oliver Philpot was shot down. Philpot was later to take part in the dramatic prison camp escape made famous in the film The Wooden Horse.[31]
- ^ Prinz Eugen had been torpedoed by the submarine HMS Trident earlier in the year, with the result that her stern had been destroyed. She was on her way back to Germany after temporary repairs in Trondheim.[50]
- ^ R. P. M. Gibbs DSO DFC and bar was invalided out of the RAF in 1944. He was to write the book Torpedo Leader about his experiences.[61]
- ^ Rowher 2005, p. 188, has 1,891 GRT for Pozarica, sunk by submarine P43/Unison on 19 August
- ^ With Mk XII torpedo, the Beaufort reached 263 mph (228 kn, 423 km/h).
- ^ With a Mk XII torpedo loaded, the Beaufort cruised at 225 mph (196 kn; 362 km/h).
References
[edit]- Citations
- ^ Angelucci, Enzo (1988). Combat aircraft of World War II. Orion Books. p. 32. ISBN 0-517-64179-8.
- ^ Barnes 1988, p. 283.
- ^ a b Robertson 1976, p. 30.
- ^ Robertson 1976, pp.52–55.
- ^ Robertson 1976 p. 3.
- ^ a b Barnes 1988, p. 290.
- ^ a b c d e Robertson 1976, p. 56.
- ^ a b c d e f Robertson 1976, p. 4.
- ^ "Bristol Beaufort." British Aircraft of World War II. Retrieved: 26 August 2010.
- ^ Wansbrough-White 1995, p. 115.
- ^ a b c Barnes 1988, p. 284.
- ^ Robertson 1976, p. 5.
- ^ a b c d Robertson 1976, p. 8.
- ^ Buttler 2000 p. 6.
- ^ Robertson 1976, pp. 6–7.
- ^ a b Robertson 1976, p. 79.
- ^ a b Barnes 1988, p. 285.
- ^ Barnes 1988, p. 286.
- ^ Robertson, 1976, pp=30–31, 79
- ^ Robertson 1976, p. 31.
- ^ Robertson, 1976, pp=56–58
- ^ a b Robertson 1976, p. 64.
- ^ Robertson 1976, pp. 56, 79.
- ^ a b Robertson 1976, p. 58.
- ^ Robertson 1976, p. 72.
- ^ Robertson 1976, pp. 64, 70, 77.
- ^ Buttler 2000 pp. 22–23.
- ^ Robertson 1976, p. 70.
- ^ a b Barker 1957, pp. 33–34.
- ^ Barker 1957, pp. 34–35.
- ^ Barker 1957, p. 19.
- ^ Robertson 1976, pp. 19–20.
- ^ Robertson 1976, pp. 20, 50–51.
- ^ a b Barker 1957, p. 75.
- ^ Robertson 1976, p. 14.
- ^ Barker 1957, pp.75–76.
- ^ Barker 1957, p. 76.
- ^ Barker 1957, p. 31.
- ^ Barker 1957, pp.9–12.
- ^ Barker 1957, pp. 60–61.
- ^ Barker 1957, p. 62.
- ^ Barker 1957, pp.62–67.
- ^ Robertson 1976, p. 18.
- ^ Prager 1983, pp. 250-256.
- ^ Barker 1957, pp. 38-31.
- ^ Robertson 1976, pp. 26–28.
- ^ Robertson 1976, p. 78.
- ^ Barnes 1988, pp. 299–300.
- ^ Buttler 2004, pp. 163–164.
- ^ Barker 1957, p. 140.
- ^ Robertson 1976, pp. 34–35.
- ^ Barker 1957, p. 164.
- ^ Robertson 1976, pp. 36–37.
- ^ Delve 1995, pp. 50–51.
- ^ Shores et al. 1991, pp. 53–54.
- ^ Rohwer 2005, p. 128
- ^ Barker 1957, pp. 179–180.
- ^ Shores et al. 1991, p. 353.
- ^ Barker 1957, p. 175.
- ^ Shores et al. 1991, pp. 356, 518.
- ^ Barker 1957, p. 231.
- ^ "38 Squadron." Archived 10 February 2008 at the Wayback Machine virgin.net. Retrieved: 26 August 2010.
- ^ Shores et al. 1991, pp. 363–364.
- ^ Rohwer 2005, p. 174.
- ^ Shores et al. 1991, p. 520.
- ^ Rohwer 2005, p. 188.
- ^ Shores et al. 1991, p. 524.
- ^ Shores et al. 1991, p. 540.
- ^ Shores et al. 1991, p. 544.
- ^ Rohwer 2005, p. 204.
- ^ a b Robertson 1976, p.46.
- ^ a b Robertson 1976, p. 60.
- ^ Green 1967, p. 25.
- ^ "The Battle of the Bismarck Sea". Battle for Australia Association. Retrieved 21 November 2020.
- ^ Gillison 1962, pp. 692–693
- ^ Thetford 1976, p. 138
- ^ a b c d e Robertson 1976, pp. 78–79.
- ^ Robertson 1976, pp. 52=55, 78.
- ^ a b c d e f Robertson 1976, pp. 64, 79.
- ^ Scott Rose. "Bristol/DAP Beaufort A9-152". warbirdregistry.org. Retrieved 23 October 2016.
- ^ Beaufort A9-164 Archived 7 January 2017 at the Wayback Machine ADF Serials Retrieved January 7, 2017
- ^ Scott Rose. "Bristol/DAP Beaufort A9-210". warbirdregistry.org. Retrieved 23 October 2016.
- ^ Scott Rose. "Bristol/DAP Beaufort A9-501". warbirdregistry.org. Retrieved 23 October 2016.
- ^ Scott Rose. "Bristol/DAP Beaufort A9-557". warbirdregistry.org. Retrieved 23 October 2016.
- ^ Scott Rose. "Bristol/DAP Beaufort A9-559". warbirdregistry.org. Retrieved 23 October 2016.
- ^ "Beaufort". aarg.com.au. Archived from the original on 3 November 2016. Retrieved 23 October 2016.
- ^ Scott Rose. "Bristol/DAP Beaufort T9552". warbirdregistry.org. Retrieved 23 October 2016.
- ^ Scott Rose. "Bristol/DAP Beaufort A9-141". warbirdregistry.org. Retrieved 23 October 2016.
- ^ Scott Rose. "Bristol/DAP Beaufort A9-555". warbirdregistry.org. Retrieved 23 October 2016.
- ^ Scott Rose. "Bristol/DAP Beaufort". warbirdregistry.org. Retrieved 23 October 2016.
- ^ John Parker (15 August 2016). "Beaufort Bomber cockpit – HARS Restoration". warbirdsonline.com.au. Retrieved 30 October 2020.
- ^ Bridgman, Leonard, ed. (1989). Jane's Fighting aircraft of World War II (1995 ed.). New York: Military Press. p. 111. ISBN 0-517-67964-7.
- ^ Lednicer, David. "The Incomplete Guide to Airfoil Usage". m-selig.ae.illinois.edu. Retrieved 16 April 2019.
- Bibliography
- Barker, Ralph. The Ship-Busters: The Story of the R.A.F. Torpedo-Bombers. London: Chatto & Windus Ltd., 1957. No ISBN.
- Barnes, C.H. Bristol Aircraft Since 1910. London: Putnam Aeronautical, 1988 (3rd revised edition). ISBN 0-85177-823-2.
- Buttler, Tony. Bristol Beaufort (Warpaint Series No. 50). Milton Keynes, Buckinghamshire, UK: Warpaint Books Ltd., 2000. ASIN B001PGMECK.
- Buttler, Tony. British Secret Projects: Fighters and Bombers 1935–1950. Hersham, Surrey, UK: Midland, 2004. ISBN 1-85780-179-2.
- Delve, Ken. "Beaufort Weather: Mediterranean Anti-shipping Strikes by 39 Squadron". Air Enthusiast, No. 65, September/October 1996, pp. 26–39. ISSN 0143-5450.
- Gibbs, Patrick (Wing Commander, DSO,DFC and Bar). Torpedo Leader. London: Wrens Park Publishing, 2002. ISBN 0-905778-72-3
- Gillison, Douglas (1962). Royal Australian Air Force 1939–1942. Australia in the War of 1939–1945: Series 3 – Air. Vol. 1. Canberra: Australian War Memorial. OCLC 2000369.
- Green, William. War Planes of the Second World War, Volume Seven: Bombers and Reconnaissance Aircraft. New York: Doubleday and Company, 1967. No ISBN.
- Hayward, Roger. Beaufort File. Tonbridge, Kent, UK: Air-Britain (Historians) Ltd., 1990. ISBN 0-85130-171-1.
- Prager, Hans Georg (1983). Panzerschiff Deutschland, Schwerer Kreuzer Lützow: ein Schiffs-Schicksal vor den Hintergründen seiner Zeit [Armored Ship Deutschland, Heavy Cruiser Lützow: A Ship's Fate in the Circumstances of its Time] (in German). München: Heyne. ISBN 3-453-01801-X.
- Roba, Jean-Louis & Cony, Christophe (September 2001). "Donnerkeil: 12 février 1942" [Operation Donnerkeil: 12 February 1942]. Avions: Toute l'Aéronautique et son histoire (in French) (102): 46–53. ISSN 1243-8650.
- Roba, Jean-Louis & Cony, Christophe (October 2001). "Donnerkeil: 12 février 1942" [Operation Donnerkeil: 12 February 1942]. Avions: Toute l'Aéronautique et son histoire (in French) (103): 25–32. ISSN 1243-8650.
- Robertson, Bruce. Beaufort Special. Shepperton, Surrey, UK: Ian Allan Ltd., 1976. ISBN 0-7110-0667-9.
- Rohwer, Jürgen (2005). Chronology of the War at Sea, 1939–1945: The Naval History of World War Two. Annapolis: US Naval Institute Press. ISBN 978-1-59114-119-8.
- Shores, Christopher, Brian Cull and Nicola Malizia. Malta: The Spitfire Year. London: Grub Street, 1991. ISBN 0-948817-16-X.
- Thetford, Owen. Aircraft of the Royal Air Force since 1918. London:Putnam, 1976. ISBN 0 370 10056 5
- Wansbrough-White, Gordon. Names With Wings: The Names & Naming Systems of Aircraft & Engines Flown by the British Armed Forces 1878–1994. Shrewsbury, UK: Airlife, 1995. ISBN 1-85310-491-4.
